
This article is for those who find themselves in the spotlight, whether it’s recording videos for thought leadership, giving a virtual presentation, speaking at an online event, a podcast, or any other situation where remote recording is essential. You may suddenly find yourself having to figure out how to capture a good video or audio of yourself for your session, keynote, or digital media appearance.
You’ve been asked to contribute because you’re an expert at what you do, not because you’re skilled at creating video or audio content. This guide will help you navigate the technical aspects of looking and sounding your best, so you can focus on sharing your expertise.
Table of Contents:
This article will provide quick and simple tips to help you learn methods, and even a few tools, that will allow you to literally “present yourself in a good light” without having to spend time learning to be a video professional.
We’re gonna cover topics related to your camera, your lighting, and most importantly your sound. Again, this is not for video professionals, but for professionals that need to make a good looking and engaging video.
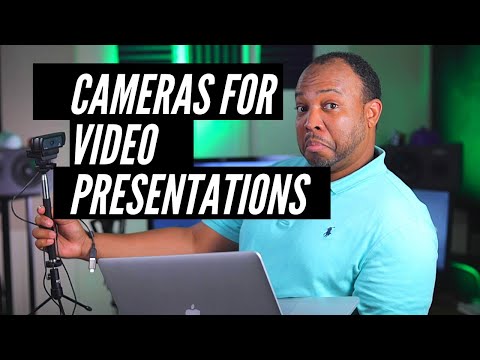
Cameras and Camera Placement for Your Virtual Presentation
How do you capture video for your virtual presentation?


Because this article is for the business professional rather than the video professional, let’s talk about the three most common options for those new to capturing video virtual presentations. Because you are likely making this video from your home or office, we will stick to the types of cameras that you already have.
- Built-In Webcams
- Separate High Definition Webcams
- Smartphone cameras
The quality levels of those types of cameras do actually fall in that order. Webcams built into your computer are “OK” and they work, but can be a challenge in regards to lighting and placement. Separate high-definition (HD) webcams (like a Logitech C920) do much better with clarity and adjusting for lighting conditions.
Then, there is your smartphone. Which if purchased in the past 5 years, is way better than any webcam. I’ll show you how to get the best results from each of these, then you can choose which camera works best for you.
Built-in Webcams
The biggest issue that most people face with built-in webcams is camera placement.
This applies to all cameras, but it’s critical when dealing with built-in webcams.
Allow me to introduce you to three video characters that you Do NOT want to be:
The HOSTAGE – Plain background, too close to the wall, and harsh lighting. Try giving yourself some distance and allow the viewer to have a sense of your environment.

The SNOB – This is where the camera is so low that the viewer is constantly looking up your nose. No matter what – you’re looking DOWN on us and that doesn’t FEEL good to watch very long.

The GROUNDHOG – Far too much headroom. Don’t belittle yourself by being the co-star to your ceiling.

To avoid being these characters is to understand framing. That is, where and how much of you takes up the screen.
To avoid being the SNOB or the GROUNDHOG remember this: Unless your room is really deep, we should see very little if any of your ceiling. Too much ceiling means that your camera is probably too low.
(No ceiling fan videos please!)

Solve this by stacking your laptop onto some books to get the camera at or (slightly above) eye level. Make sure that not only is the camera at eye level, the screen is also not tilted away from you. While subtle, that will make your head look smaller than your body because it’s further away.
If your screen is tilted towards you, the opposite warp happens and your head looks disproportionately bigger than your body. If you’re sitting close to the computer to get better sound… keep reading because we’re going to fix that in a moment.

Separate High Definition Webcams
High Definition (HD) Webcams that are purchased separately and are not embedded into your computer give you many more options in camera placement. Even though most are designed to sit on the top edge of your screen, most have a screw hole at the bottom that will allow you to mount them to a tripod or even a selfie stick attached to a desktop tripod.
You could even just set it on top of an object that is behind your screen. As long as you make placement and angle a priority.
By their definition, high definition cameras will create a much clearer picture and are of much higher video quality than a typical built-in webcam. Even high-end computers don’t have very good built-in cameras compared to a separate HD camera.
High definition webcams also typically come with some type of software that will allow you to adjust color and lighting settings. More on this below.
Smartphone Cameras
Your smartphone is probably the best camera that you already have to capture your virtual presentation.
Here are two key items that you want to consider when using your smartphone.
Placement
To get your smartphone into an eye level and stable position you’ll want to mount it on a tripod or light stand while using a phone holder or clip. A cheap tripod is always a solid investment if anyone in your household ever intends to make a video. There are multiple types of cheap holders that you can choose, and most have a standard size screw hole for mounting.
Camera Orientation
Always film presentations with the phone in a horizontal or landscape position.
Secondly, look into the camera!
This might sound obvious, but with a smartphone in the landscape position, the camera lens will be on the far right or left of the device. When you are looking at yourself on the screen, you are looking off-camera and will fail to make eye contact with your audience. If the camera lens is hard to see (like on iPhones), find out where it’s at, and always look directly into it when recording.
It may even help to not use selfie mode and use the back camera on the phone. It’s typically a better camera, easier to see, and you won’t be tempted to look at yourself.
Finally a few housekeeping tips:
- Clean your room from distractions
- Get rid of Moving objects – such as fans, flickering lights, moving shadows, TVs, and people
- Remove other interesting objects like clothes, branded objects, or anything that will cause a distraction from the star of the show, you.
Framing Your Shot and Camara Placement
One of the most common mistakes that people make when appearing on video is framing. While your co-workers may forgive you for bad framing on a conference call, when giving a virtual presentation you are expected to be presented in a professional and engaging way. Sitting in an odd position within the picture can say a lot about you professionally and it usually isn’t positive.
- When sitting, we should see you from about mid-chest (bottom of the frame) with only enough headroom for about 3-4 fingers above your head. If you are an animated speaker and use your hands, widen your shot to include your elbows.
- When Standing, we should see your elbows, and up to about a hand width above your head.
- When STANDING, be sure that you’ve followed the audio tips coming up – because your built-in laptop mic won’t sound very good from a distance.
- Learn to use the Rule of Thirds. Imagine your screen divided horizontally into thirds. Your eyes or nose should be along the upper third line while leaving a couple of inches of headroom. You can check this by placing 2-3 fingers on top of your head – to determine a decent amount of headroom between you and the top of the frame.

To recap the framing examples:
- Not to close and viewers aren’t looking up your nose
- You’re not too far away or too low
- You frame using the rule of thirds.
Don’t forget Eye Contact!
Look into the camera to make eye contact with your audience. You’ll lose their attention if you aren’t giving them yours.
Regardless of which camera you have available to use, follow these tips and you’ll come out with much better video.
Next, we’ll cover how to capture the best sound for your presentation.
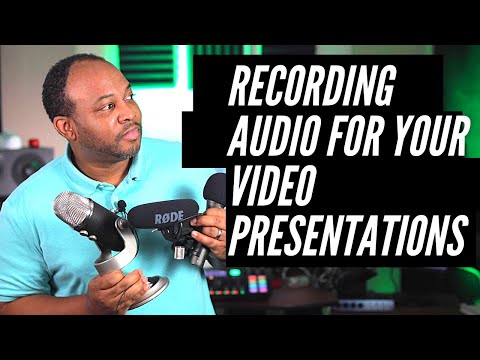
Recording the Best Audio for Your Virtual Presentation
Great sound is crucial to achieving a great virtual presentation video. Most people don’t realize why one video is more pleasant to watch than another, but it is often simply because of the sound.
Sound cannot be an afterthought. It is just as, if not more important than the image part of the video. Let’s talk about some different options to capture good audio for your video.
Watch the videos on this page to hear some of the differences.
Recording with Your Computer’s Microphone
You can record audio directly into the microphone hidden “somewhere” in the computer case. I say somewhere, because often (especially on Macs) you can’t tell where the mic is, although this placement does not typically help the audio quality no matter where it is.
Many laptops will have noise cancellation technology, which means that while it’s trying to cancel noise, it may also cancel some of your speaking voice. This is why you see some people on video and their voice is choppy, muddy, or drops out at moments.
Some computer’s mics actually sound “ok”, but understand that built-in mics will surely pick up a lot of ambient room noise, reverb, and other sounds from your environment such as air conditions. So, be sure to test and compare the quality of your sound if you go this route. If you are recording through Zoom, be sure that both you and your host have turned off any audio enhancements, and you’re recording with what Zoom calls the “Original Sound”.
Recording using a USB Microphone
If you really want to go for awesome audio and you plan to record while sitting down, use a USB microphone. These microphones connect directly into your computer and can get you a near studio-quality sound for under – $100. One of the most popular that you’ve probably seen is the Blue Yeti.
But there are several others that work great for less, such as dynamic mics like the Audio Technica ATR-2100 or Samson’s Q2U. Keep in mind that if you have a Blue Yeti, it is a Side-Address microphone, so you talk into the side of it (not the tip) for the best audio. These types of microphones are plug and play and can be a great addition to your everyday conference calls.
Recoding with a Lavalier Microphone
For the most freedom in movement and better sound at the same time, I suggest a lavalier microphone. This can work with both your computer and your smartphone. And you can get a decent one with a long cable for around $20-35 bucks. [See the video for an example]
With a lavalier microphone, not only will you be clearer and easier to understand, but you can also back away from the camera and still have great audio. Ideally, lavalier mics will be attached to your clothing, shirt, or jacket. Make sure that the mic is only a foot or less from your mouth, and not rubbing against any clothing.
Be aware that your phone and possibly your computer will need what’s called a TRRS connection. That stands for the Tip, Ring, Ring, Sleeve pattern you’ll see on the plug. If your lavalier does not look like this and has only three sections (Tip, Ring, Sleeve), you’ll need an adaptor.
For phones with no headphone jacks, the dongle adaptor that came with your phone will do the trick. If you buy a lavalier designed specifically for phones, then this type of plug will already be attached.

Recording Video with Earbuds and Airpods
Earbuds or AirPods are NOT ideal for recording video onto your computer for virtual presentations (nor for live interviews). While they sound ok for a conference call, I would not advise to use them for a presentation video. Pods have a narrow sound frequency (like a telephone) which makes them not very pleasant to listen to for a presentation.
Plug-in earbuds sound much better than AirPods but tend to rub against clothing producing distractions. So, only use one of these – as a last resort.
To recap recording sound for your virtual presentation:
- Built-in Computer mics are ok, but only when you’re close to them and your room is very quiet and free from reverb and echos.
- USB microphones provide excellent voice quality. The investment is worth it if you present often.
- Lavalier mics sound great and are versatile for movement and connection to both computers and smartphones.
- Earbuds and Airpods – Not preferred for presentations because of poor sound. Use as a last resort.
Now you know about several options to capture good audio. Everyone’s situation is different so use which works best for you, your budget, and your environment. Just keep these tips in mind and you’ll come out with much better video.
Now, up next is the icing on the cake. You’ve heard the phrase “I want to be seen in a good light.” Well, that’s because bad lighting can ruin everything.
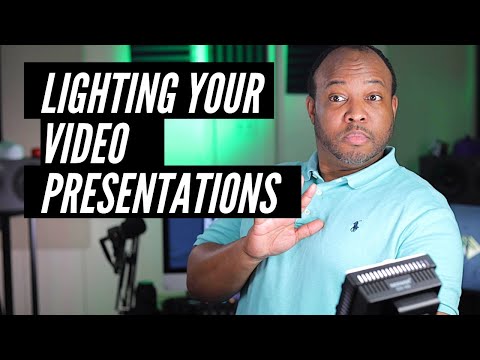
Lighting Your Virtual Presentation Video
Now we want to literally make sure that you are seen in the best light.
Webcams and smartphones will automatically try to adjust your picture based on the lighting in the shot or frame. As I mentioned before, detached high-definition (HD) webcams are a big step up and manage lighting better than most built-in webcams. They will be clearer and more adaptable to different light scenarios.
On Windows computers, Logitech and other webcam suppliers generally include some camera software or control that allows you to make exposure and color adjustments to your webcam. This can help you brighten up a dark image or richen up the color.
Webcams for the Mac are generally plug-n-play and don’t require driver installations, and some of the later ones from Logitech even have control software that you can install. But in most cases, you’ll need a third-party app like Webcam Settings to tweak your exposure and color settings.
That being said, the best way to have good lighting exposure, is to provide sufficient light on yourself in the first place.
Let me introduce you to a couple more characters that you DO NOT want to be:
The WITNESS PROTECTION – Bright light BEHIND causing you to be seen more as a silhouette

GRAINY JANEY – Because when a camera tries to compensate for LOW light, you end up with an OVERLY GRAINY video image.

As we mentioned in the earlier video, detached HD Webcams are better for dealing with low light and you’ll get even better results with your camera phone.
Here are some tips to optimize how you use light:
- Avoid Backlighting: To avoid being the “Witness Protection” character, the primary source of light in the room should be aimed towards your face. Not your back.
- If there is a large light source behind you that you can’t avoid, then you must add an equal amount of light in front of you. We’ll cover some lighting options below.
- Light Your Face: The best lighting is natural light. Try to set up facing a window. You don’t want harsh direct sunlight so thin curtains or a cloudy day are your friends. This is one case where a cloudy day actually works in your favor because clouds soften the light and will make you look even better.
- If you don’t have a good place to catch daylight, or if you have to record at night, then you’ll need some type of artificial lighting in front of you.
- Avoid sitting directly under a light. When lights beam down directly from overhead they’ll cast unsightly shadows on your face. Your eyes will especially look bad. Make sure that your primary light is in front of you. Not above.
- If your main room light is casting shadows under your eyes, you can fix that by adding a little additional light pointing directly at you.
- Desk lamps (ideally more than one) can work, but make sure that the bulbs are bright white to daylight color. These variations in lighting color are referred to as the light temperature. “Cool” for bright daylight brightness and “warm” for more yellow shades of light.
- You definitely want to aim for “cool” lights, as your camera will respond better and give a more accurate skin tone color. Especially, if you are using a webcam.

If you’re looking to buy a light for your video, here are some tips:
If you don’t have a ring light…. Don’t buy one. Ring lights are only ideal for photographers and beauty vloggers. – Why?
- The circular Catchlights in your eyes can be distracting or annoying. While attractive in photos, they can be very DISTRACTING in video. ESPECIALLY IF YOUR WEAR GLASSES.
- For Reflections in eyeglasses – you can avoid the distraction by raising your light to a higher angle. This will aim the reflection away from the camera. The problem with a ring light is, that if you have your camera inside of the ring then now you’ve moved your camera out of its ideal position.

If you already have a ring light, by all means still use it. Here are my suggestions though:
- Find a way to move your camera outside of the ring. Having it on a separate stand will give you more vertical and horizontal options with lighting placement. This movement won’t affect your camera placement.
- Move the ring up or to the side to position away from any reflection in eyeglasses. This will help so that you can’t see reflections in the camera.
- If you do video often plan to purchase a light, I suggest a square LED light and maybe even a softbox.
- You can get these both for around $150 or even smaller desk versions for as little as $50 for a pair of two.
To recap lighting for your virtual presentation video:
- Backlighting – Bad
- Top Lighting – Not Good
- Front lighting pointing at your face – Best
Now you know about several options to help LIGHT your video. Everyone’s situation is different, so use which works best for you, your budget, and your environment. Just keep these tips in mind and you’ll come out with MUCH better video.
If you have any questions about creating video, either for virtual events or even conference calls contact us.
You can also connect directly with A. Lee Judge on Twitter and LinkedIn @ALeeJudge
- B2B Influencer Marketing: What B2B Companies Get Wrong
 B2B influencer marketing is growing faster than most companies can learn …
 - Digital Marketing Attribution Is Nearly Useless. What Do You Do Now?
 Digital marketing attribution is on its last leg. For years it …
 - Inside Buffer’s Creator-Driven Culture: Sabreen Haziq on Content, Measurement, and Community Growth
 Sabreen Haziq leads brand, community building, and creator innovation at Buffer, …